まとめとかで見かけるアレを作るためのスクリプトを作ってみました。ImageMagick が必要ですが…。
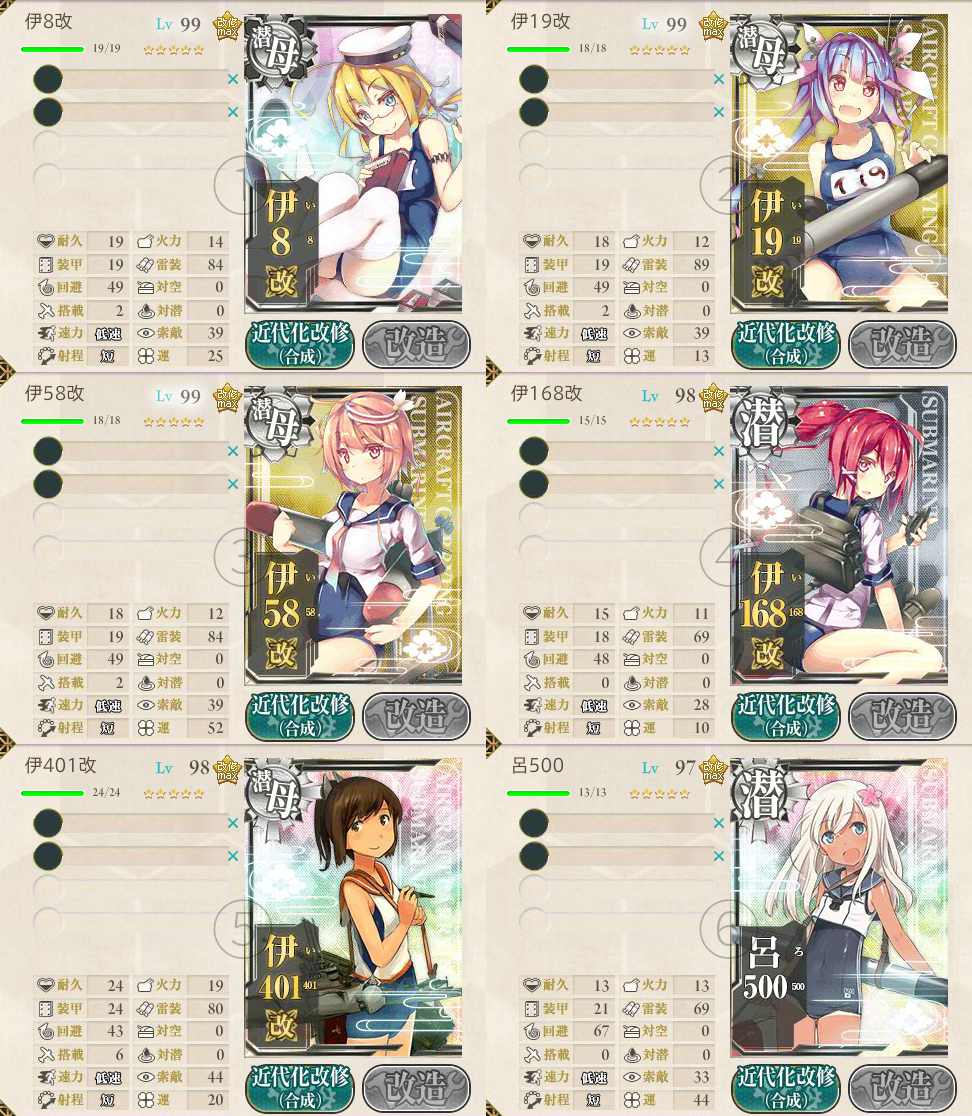
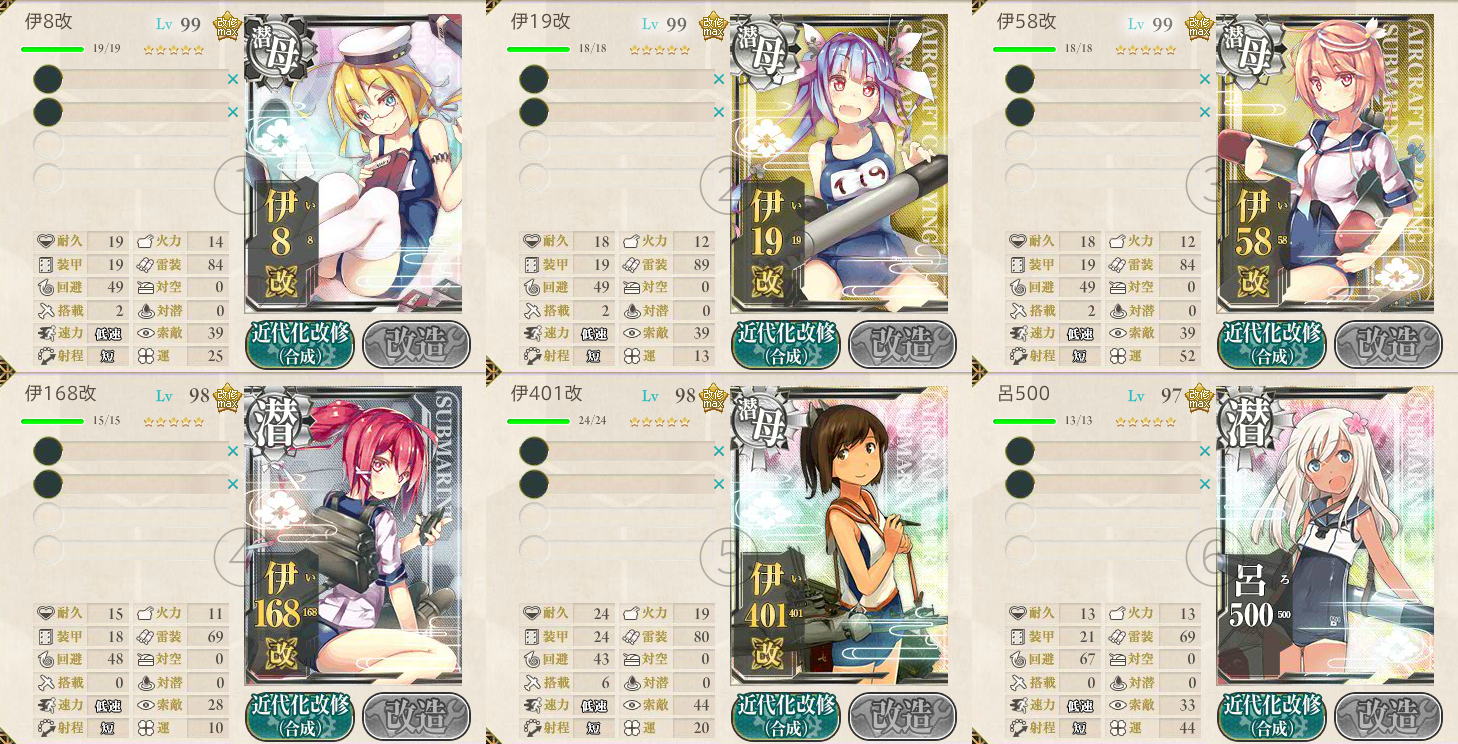
艦これの画面画像(800x480ピクセル)があれば横2や横3などのレイアウトで一覧を簡単に作ることができます。
■2列レイアウト
■3列レイアウト
■3列レイアウト(文字カスタマイズ版)

#!/bin/sh

# 出力ファイル名
out=units.png

# 座標
w=486 h=372 x=314 y=96

# 横のサイズ
columns=2

# 文字色
fill=#00000040

# フォント
font="Noto-Sans-CJK-JP-Bold"

# フォントサイズ
pointsize=64

( convert -verbose "${1}" -crop ${w}x${h}+${x}+${y}\! -gravity Center -font ${font} -pointsize ${pointsize} -fill ${fill} -annotate 0 "①" miff:- | \
( convert -verbose "${2}" -crop ${w}x${h}+${x}+${y}\! -gravity Center -font ${font} -pointsize ${pointsize} -fill ${fill} -annotate 0 "②" miff:- | \
( convert -verbose "${3}" -crop ${w}x${h}+${x}+${y}\! -gravity Center -font ${font} -pointsize ${pointsize} -fill ${fill} -annotate 0 "③" miff:- | \
( convert -verbose "${4}" -crop ${w}x${h}+${x}+${y}\! -gravity Center -font ${font} -pointsize ${pointsize} -fill ${fill} -annotate 0 "④" miff:- | \
( convert -verbose "${5}" -crop ${w}x${h}+${x}+${y}\! -gravity Center -font ${font} -pointsize ${pointsize} -fill ${fill} -annotate 0 "⑤" miff:- | \
( convert -verbose "${6}" -crop ${w}x${h}+${x}+${y}\! -gravity Center -font ${font} -pointsize ${pointsize} -fill ${fill} -annotate 0 "⑥" miff:- | \
  montage -tile ${columns}x -resize 100% -geometry +0+0 fd:3 fd:4 fd:5 fd:6 fd:7 fd:8 ${out} 8<&0 ) 7<&0 ) 6<&0 ) 5<&0 ) 4<&0 ) 3<&0 )
本当はオプションとか追加した方が使い勝手がいいんですけどメモ書きのようなものなので簡単に…。
convert を6回も使わないのでも -append や +append を組み合わせれば一回で作れちゃいます。わざわざ6回も convert を使っているのは montage にデータを渡すため。montage は -tile オプションで縦や横の数を指定できるのに convert にはそれがない(はず)。ちょいちょいレイアウトを変えるとなると montage を使ったほうが楽なんですね。
よく見かけるものには順番が書いてないので艦の順番をオーバープリントしてみました。これを作る前に Twitter なんかで改めて一覧の画像を見てみるとみんな結構ずれてるんだなぁ〜と思ったり。一枚一枚画像編集ソフトとかで作ってるのだろうか。
この前作った反射効果とか入っているものはマスク処理で悩んでるのでまたそのうち。