Heroku Redis を使っている方から「Redis だけ AWS を利用出来ないか?」というご相談をいただいたので検証してみた。
本記事は接続検証を目的としたものです。本記事に起因して発生したいかなるトラブルや損害等について当方は一切責任を負いません。
事前調査
- Elasticache のエンドポイントには EIP を付与することはできない。
- Elasticache で作成したエンドポイントにはパブリック IP が付与できないので EC2 インスタンスのように外から簡単にアクセス出来るようにはなっていない。
- Network Load Balancer を使えば TCP のロードバランシングも出来るが、ターゲットには IP アドレスか EC2 インスタンスしか選択できないので Elasticache のエンドポイントが指定できない。(プライマリのプライベート IP アドレス決め打ちなら出来るかもしれないが問題が起きた時に変更するの面倒)
というわけでリバースプロキシを立てることにして、今回は HAProxy メインで、NGINX でも検証してみる。透過プロキシは設定が面倒なので普通のリバースプロキシで。
AWS の構成
VPC
パブリックサブネット1つとプライベートサブネットを1つ作成する。パブリックサブネットに EC2 インスタンスを配置、Elasticache のサブネットグループでプライベートサブネットを指定する。
EIP
EC2 インスタンス用に1つ作成しておく。(グローバル IP が変わってもいいなら不要)
セキュリティグループ
EC2 インスタンス用と Redis 用の2つを用意する。HAProxy で 6379 番ポートを待ち受けるのは危険なので Redis のデフォルトから変更してソースもマイ IP で絞り込んでおく。
EC2 インスタンス用
| タイプ | プロトコル | ポート範囲 | ソース |
|---|---|---|---|
| SSH | TCP | 22 | マイ IP |
| カスタム TCP ルール | TCP | 16379 | マイ IP |
Redis 用
| タイプ | プロトコル | ポート範囲 | ソース |
|---|---|---|---|
| カスタム TCP ルール | TCP | 6379 | ↑で作った EC2 インスタンス用のセキュリティグループ |
EC2 インスタンス
普通の EC2 インスタンスを作成する。Amazon Linux 系はバージョンがかなり古いので Ubuntu が良いかもね。SSL 対応は HAProxy 1.5 からなので Amazon Linux も一応対応してる。
amzn2-ami-hvm-2.0.20190228-x86_64-gp2 (ami-097473abce069b8e9)
HA-Proxy version 1.5.18 2016/05/10
Copyright 2000-2016 Willy Tarreau <willy@haproxy.org>

Build options :
  TARGET  = linux2628
  CPU     = generic
  CC      = gcc
  CFLAGS  = -O2 -g -fno-strict-aliasing -DTCP_USER_TIMEOUT=18
  OPTIONS = USE_LINUX_TPROXY=1 USE_ZLIB=1 USE_REGPARM=1 USE_OPENSSL=1 USE_PCRE=1

Default settings :
  maxconn = 2000, bufsize = 16384, maxrewrite = 8192, maxpollevents = 200

Encrypted password support via crypt(3): yes
Built with zlib version : 1.2.7
Compression algorithms supported : identity, deflate, gzip
Built with OpenSSL version : OpenSSL 1.0.2k-fips  26 Jan 2017
Running on OpenSSL version : OpenSSL 1.0.2k-fips  26 Jan 2017
OpenSSL library supports TLS extensions : yes
OpenSSL library supports SNI : yes
OpenSSL library supports prefer-server-ciphers : yes
Built with PCRE version : 8.32 2012-11-30
PCRE library supports JIT : no (USE_PCRE_JIT not set)
Built with transparent proxy support using: IP_TRANSPARENT IPV6_TRANSPARENT IP_FREEBIND

Available polling systems :
      epoll : pref=300,  test result OK
       poll : pref=200,  test result OK
     select : pref=150,  test result OK
Total: 3 (3 usable), will use epoll.
ubuntu/images/hvm-ssd/ubuntu-bionic-18.04-amd64-server-20190212.1 (ami-0eb48a19a8d81e20b)
HA-Proxy version 1.8.8-1ubuntu0.4 2019/01/24
Copyright 2000-2018 Willy Tarreau <willy@haproxy.org>

Build options :
  TARGET  = linux2628
  CPU     = generic
  CC      = gcc
  CFLAGS  = -g -O2 -fdebug-prefix-map=/build/haproxy-Mxbbv4/haproxy-1.8.8=. -fstack-protector-strong -Wformat -Werror=format-security -Wdate-time -D_FORTIFY_SOURCE=2
  OPTIONS = USE_GETADDRINFO=1 USE_ZLIB=1 USE_REGPARM=1 USE_OPENSSL=1 USE_LUA=1 USE_SYSTEMD=1 USE_PCRE=1 USE_PCRE_JIT=1 USE_NS=1

Default settings :
  maxconn = 2000, bufsize = 16384, maxrewrite = 1024, maxpollevents = 200

Built with OpenSSL version : OpenSSL 1.1.0g  2 Nov 2017
Running on OpenSSL version : OpenSSL 1.1.0g  2 Nov 2017
OpenSSL library supports TLS extensions : yes
OpenSSL library supports SNI : yes
OpenSSL library supports : TLSv1.0 TLSv1.1 TLSv1.2
Built with Lua version : Lua 5.3.3
Built with transparent proxy support using: IP_TRANSPARENT IPV6_TRANSPARENT IP_FREEBIND
Encrypted password support via crypt(3): yes
Built with multi-threading support.
Built with PCRE version : 8.39 2016-06-14
Running on PCRE version : 8.39 2016-06-14
PCRE library supports JIT : yes
Built with zlib version : 1.2.11
Running on zlib version : 1.2.11
Compression algorithms supported : identity("identity"), deflate("deflate"), raw-deflate("deflate"), gzip("gzip")
Built with network namespace support.

Available polling systems :
      epoll : pref=300,  test result OK
       poll : pref=200,  test result OK
     select : pref=150,  test result OK
Total: 3 (3 usable), will use epoll.

Available filters :
        [SPOE] spoe
        [COMP] compression
        [TRACE] trace
Elasticache Redis
クラスタ構成無しで作成。HAProxy が SSL オフローダーになるので SSL 対応不要な気がするけど実験なので「送信中の暗号化」を有効にしておく。他は以下のように設定。
- 疎通確認なので「Redis AUTH」は使わない。
- サブネットグループにはプライベートサブネットを選択。
- EC2 に付与してあるセキュリティグループからのみ 6379 番ポートのインバウンド接続を受け付けるセキュリティグループを用意する。

HAProxy の設定
まずはインストールから。
yum install haproxy
service haproxy start
chkconfig haproxy on
apt install haproxy
設定はどちらも /etc/haproxy/haproxy.cfg くらいしか使わない。
自己署名証明書を作成する
HAProxy を SSL 対応させるために証明書を作成するんだけど実験なので自己署名で作成する。ドメイン持ってるなら Let's Encrypt で作成した privkey.pem と fullchain.pem を結合したものを用意すれば良い。
ファイルの配置は以下のようにするけど人それぞれ。
/etc/haproxy/
|
+-- haproxy.cfg
|
+-- ssl/
    |
    +-- haproxy.pem
自己署名なので openssl req コマンドで作成するけどいつも忘れるのでここらでちゃんと覚えておく。
Usage: req [options]
Valid options are:
 -help               Display this summary
 -inform PEM|DER     Input format - DER or PEM
 -outform PEM|DER    Output format - DER or PEM
 -in infile          Input file
 -out outfile        Output file
 -key val            Private key to use
 -keyform format     Key file format
 -pubkey             Output public key
 -new                New request
 -config infile      Request template file
 -keyout outfile     File to send the key to
 -passin val         Private key password source
 -passout val        Output file pass phrase source
 -rand val           Load the file(s) into the random number generator
 -newkey val         Specify as type:bits
 -pkeyopt val        Public key options as opt:value
 -sigopt val         Signature parameter in n:v form
 -batch              Do not ask anything during request generation
 -newhdr             Output "NEW" in the header lines
 -modulus            RSA modulus
 -verify             Verify signature on REQ
 -nodes              Don't encrypt the output key
 -noout              Do not output REQ
 -verbose            Verbose output
 -utf8               Input characters are UTF8 (default ASCII)
 -nameopt val        Various certificate name options
 -reqopt val         Various request text options
 -text               Text form of request
 -x509               Output a x509 structure instead of a cert request
                     (Required by some CA's)
 -subj val           Set or modify request subject
 -subject            Output the request's subject
 -multivalue-rdn     Enable support for multivalued RDNs
 -days +int          Number of days cert is valid for
 -set_serial val     Serial number to use
 -extensions val     Cert extension section (override value in config file)
 -reqexts val        Request extension section (override value in config file)
 -*                  Any supported digest
 -engine val         Use engine, possibly a hardware device
 -keygen_engine val  Specify engine to be used for key generation operations
使うオプションは以下の通り。対話形式で作成したいなら -subj は省略。
| オプション | 動作 |
|---|---|
-new |
新規リクエスト |
-x509 |
証明書要求の代わりに X509 構造体を出力する |
-nodes |
鍵を暗号化しない(パスワード不要で作成する) |
-newkey type:bits |
鍵のタイプを指定する(例:rsa:2048) |
-keyout /path/to/file |
鍵の出力先 |
-out /path/to/file |
出力先(-x509 と併用しているので証明書の出力先) |
-subj val |
対話形式での回答を省略 |
-days val |
証明書の有効期間を指定 |
Common Name を EIP の IP アドレスにしておく。秘密鍵と証明書を分けて作成してあとから結合してもいいけど、実験なので最初からまとめてしまう。
install -d -m 0700 /etc/haproxy/ssl
openssl req -new -x509 -nodes \
  -newkey rsa:2048 \
  -keyout /etc/haproxy/ssl/haproxy.pem \
  -out /etc/haproxy/ssl/haproxy.pem \
  -subj "/C=JP/CN=192.168.1.254" \
  -days 365
chmod 0600 /etc/haproxy/ssl/haproxy.pem
HAProxy の SSL 設定
Amazon Linux と Ubuntu でバージョンが異なるため初期設定も異なる。以下には必要なところだけ記載しているので詳しくは各バージョンごとの公式ドキュメントを参照。frontend ブロックで入力を作って backend で出力を作ってやればよい。
global
  ssl-default-bind-ciphers ECDH+AESGCM:DH+AESGCM:ECDH+AES256:DH+AES256:ECDH+AES128:DH+AES:RSA+AESGCM:RSA+AES:!aNULL:!MD5:!DSS
# ssl-default-bind-options no-sslv3
# tune.ssl.default-dh-param 2048

defaults
  log    global
  mode   tcp
  option tcplog
  option dontlognull

## 非 SSL 用設定例
frontend nossl
  bind *:16379
  default_backend redis-nossl

backend redis-nossl
  server redis-1 名前.apne1.cache.amazonaws.com:6379 check

## SSL 用設定例(フロントエンド、バックエンドともに SSL 対応)
frontend ssl
  bind *:16380 ssl crt /etc/haproxy/ssl/haproxy.pem
  default_backend redis-ssl

backend redis-ssl
  server redis-1 master.名前.apne1.cache.amazonaws.com:6379 check ssl verify none
Amazon Linux の場合、ssl-default-bind-options no-sslv3 だとオプションが存在しないためエラーになる。また、tune.ssl.default-dh-param 2048 を書いておかないと起動時に警告がでる。
Amazon Linux と Ubuntu の haproxy.cfg のソース
インスタンス作って確認するの面倒なので残しておく。
#---------------------------------------------------------------------
# Example configuration for a possible web application.  See the
# full configuration options online.
#
#   http://haproxy.1wt.eu/download/1.4/doc/configuration.txt
#
#---------------------------------------------------------------------

#---------------------------------------------------------------------
# Global settings
#---------------------------------------------------------------------
global
    # to have these messages end up in /var/log/haproxy.log you will
    # need to:
    #
    # 1) configure syslog to accept network log events.  This is done
    #    by adding the '-r' option to the SYSLOGD_OPTIONS in
    #    /etc/sysconfig/syslog
    #
    # 2) configure local2 events to go to the /var/log/haproxy.log
    #   file. A line like the following can be added to
    #   /etc/sysconfig/syslog
    #
    #    local2.*                       /var/log/haproxy.log
    #
    log         127.0.0.1 local2

    chroot      /var/lib/haproxy
    pidfile     /var/run/haproxy.pid
    maxconn     4000
    user        haproxy
    group       haproxy
    daemon

    # turn on stats unix socket
    stats socket /var/lib/haproxy/stats

#---------------------------------------------------------------------
# common defaults that all the 'listen' and 'backend' sections will
# use if not designated in their block
#---------------------------------------------------------------------
defaults
    mode                    http
    log                     global
    option                  httplog
    option                  dontlognull
    option http-server-close
    option forwardfor       except 127.0.0.0/8
    option                  redispatch
    retries                 3
    timeout http-request    10s
    timeout queue           1m
    timeout connect         10s
    timeout client          1m
    timeout server          1m
    timeout http-keep-alive 10s
    timeout check           10s
    maxconn                 3000

#---------------------------------------------------------------------
# main frontend which proxys to the backends
#---------------------------------------------------------------------
frontend  main *:5000
    acl url_static       path_beg       -i /static /images /javascript /stylesheets
    acl url_static       path_end       -i .jpg .gif .png .css .js

    use_backend static          if url_static
    default_backend             app

#---------------------------------------------------------------------
# static backend for serving up images, stylesheets and such
#---------------------------------------------------------------------
backend static
    balance     roundrobin
    server      static 127.0.0.1:4331 check

#---------------------------------------------------------------------
# round robin balancing between the various backends
#---------------------------------------------------------------------
backend app
    balance     roundrobin
    server  app1 127.0.0.1:5001 check
    server  app2 127.0.0.1:5002 check
    server  app3 127.0.0.1:5003 check
    server  app4 127.0.0.1:5004 check
global
    log /dev/log    local0
    log /dev/log    local1 notice
    chroot /var/lib/haproxy
    stats socket /run/haproxy/admin.sock mode 660 level admin expose-fd listeners
    stats timeout 30s
    user haproxy
    group haproxy
    daemon

    # Default SSL material locations
    ca-base /etc/ssl/certs
    crt-base /etc/ssl/private

    # Default ciphers to use on SSL-enabled listening sockets.
    # For more information, see ciphers(1SSL). This list is from:
    #  https://hynek.me/articles/hardening-your-web-servers-ssl-ciphers/
    # An alternative list with additional directives can be obtained from
    #  https://mozilla.github.io/server-side-tls/ssl-config-generator/?server=haproxy
    ssl-default-bind-ciphers ECDH+AESGCM:DH+AESGCM:ECDH+AES256:DH+AES256:ECDH+AES128:DH+AES:RSA+AESGCM:RSA+AES:!aNULL:!MD5:!DSS
    ssl-default-bind-options no-sslv3

defaults
    log global
    mode    http
    option  httplog
    option  dontlognull
        timeout connect 5000
        timeout client  50000
        timeout server  50000
    errorfile 400 /etc/haproxy/errors/400.http
    errorfile 403 /etc/haproxy/errors/403.http
    errorfile 408 /etc/haproxy/errors/408.http
    errorfile 500 /etc/haproxy/errors/500.http
    errorfile 502 /etc/haproxy/errors/502.http
    errorfile 503 /etc/haproxy/errors/503.http
    errorfile 504 /etc/haproxy/errors/504.http
Amazon Linux でのログファイルの出力設定
rsyslog の設定
Amazon Linux ではログが rsyslog に飛ぶようになっているので UDP を有効にして local2.* を /var/log/haproxy.log にでも出力されるようにしておけば良い。
--- /dev/fd/63  2019-03-13 11:21:15.779833034 +0000
+++ /etc/rsyslog.conf   2019-03-11 04:56:02.570224255 +0000
@@ -10,8 +10,8 @@
 #$ModLoad immark  # provides --MARK-- message capability

 # Provides UDP syslog reception
-#$ModLoad imudp
-#$UDPServerRun 514
+$ModLoad imudp
+$UDPServerRun 514

 # Provides TCP syslog reception
 #$ModLoad imtcp
@@ -55,6 +55,7 @@

 # Save boot messages also to boot.log
 local7.*                                                /var/log/boot.log
+local2.*                                                /var/log/haproxy.log


 # ### begin forwarding rule ###
AWS Logs の設定
CloudWatch Logs にログを飛ばす場合は以下のように書いておく。インスタンスにロールを付与しておくのを忘れずに。
[/var/log/haproxy.log]
datetime_format = %b %d %H:%M:%S
file = /var/log/haproxy.log
log_stream_name = /var/log/haproxy.log
initial_position = start_of_file
log_group_name = foo
サービスの再起動
sudo service haproxy restart
sudo systemctl restart haproxy
HAProxy Statistics Report を使う場合
ロードバランシングの状態が確認できる。haproxy.cfg のどこかに listen ディレクティブを作って軽く定義するだけで使える。
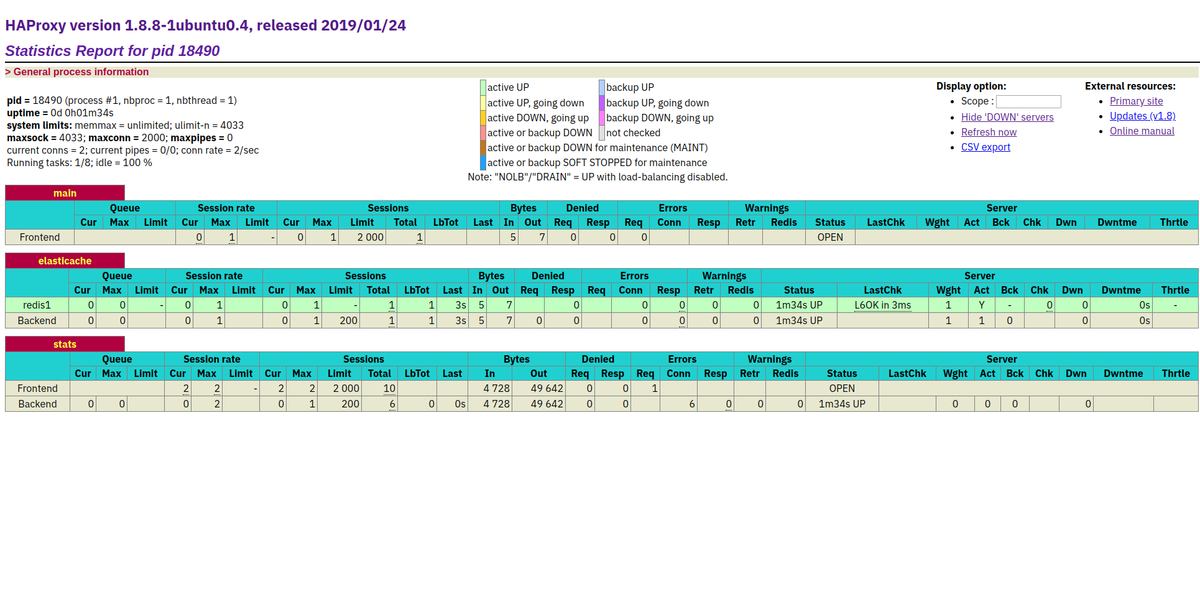
HAProxy の状態 haproxy.cfg に listen というディレクティブで設定を書いていく。書き方は色々あるけど Datadog さんのサンプルがわかりやすいかな。
- https://cbonte.github.io/haproxy-dconv/1.8/configuration.html#stats%20enable
- https://www.datadoghq.com/blog/how-to-collect-haproxy-metrics/
listen stats # Define a listen section called "stats"
  bind :9000 # Listen on localhost:9000
  mode http
  stats enable  # Enable stats page
  stats hide-version  # Hide HAProxy version
  stats realm Haproxy\ Statistics  # Title text for popup window
  stats uri /haproxy_stats  # Stats URI
  stats auth Username:Password  # Authentication credentials
NGINX で同じことやってみる
NGINX にもリバースプロキシの機能があるので試してみた。ポイントは秘密鍵と証明書が別ってところと、stream 内では access_log が使えないので error_log 使うくらいかな。
stream {
        server {
                listen 16379 ssl;
                ssl_protocols TLSv1 TLSv1.1 TLSv1.2;
                ssl_prefer_server_ciphers on;
                proxy_pass redis-ssl;
                proxy_ssl on;
                ssl_certificate     /etc/nginx/ssl/cert.pem;
                ssl_certificate_key /etc/nginx/ssl/privkey.pem;
                error_log /var/log/nginx/proxy.log info;
        }
        upstream redis-ssl {
                server master.名前.apne1.cache.amazonaws.com:6379;
        }
}
接続テスト
192.168.1.254 は EIP のアドレスに置き換えてください。
openssl コマンド
openssl s_client -connect 192.168.1.254:16379
ping
set foo bar
get foo
Python
import redis
r = redis.Redis(host='192.168.1.254', port=16379, ssl=True)
r.ping()
r.set('foo', 'bar')
r.get('foo')
Ruby
require "redis"
r = Redis.new(url: "rediss://192.168.1.254:16379")
r.ping()
r.set("foo", "bar")
r.get("foo")
追記
Google Chrome 58+ から CN ではなく Subject Alternative Name(SAN)を確認するようになったため -addet オプションで情報を追加する。
openssl req -x509 -newkey rsa:4096 \
            -keyout server.key \
            -out server.crt \
            -subj "/C=JP/CN=example.com" \
            -addext "subjectAltName = DNS:example.com, DNS:*.example.com, IP: 192.168.1.254" \
            -nodes -days 3650
内容は下記のコマンドで確認することができる。
openssl x509 -noout -text < server.crt
メモ: Nginx の dhparam 設定方法
openssl dhparam -out dhparam.pem 2048
server {
    listen 443 ssl http2;
    :
    ssl_certificate     /etc/nginx/server.crt;
    ssl_certificate_key /etc/nginx/ssl/server.key;
    ssl_dhparam         /etc/nginx/dhparam.pem;
    :
}
 【セット買い】")
![【ギフト プレゼント に】【Amazon.co.jp限定】 【ジャパニーズクラフトジン飲み比べセット】 翠 (SUI) 700ml × ROKU (六) 200ml ソーダ割専用グラス付 セット [ ジン 700ml×1本、200ml×1本 ]](https://m.media-amazon.com/images/I/51hZRszX2OL._SL500_.jpg "【ギフト プレゼント に】【Amazon.co.jp限定】 【ジャパニーズクラフトジン飲み比べセット】 翠 (SUI) 700ml × ROKU (六) 200ml ソーダ割専用グラス付 セット [ ジン 700ml×1本、200ml×1本 ]")

)")
 【セット買い】")